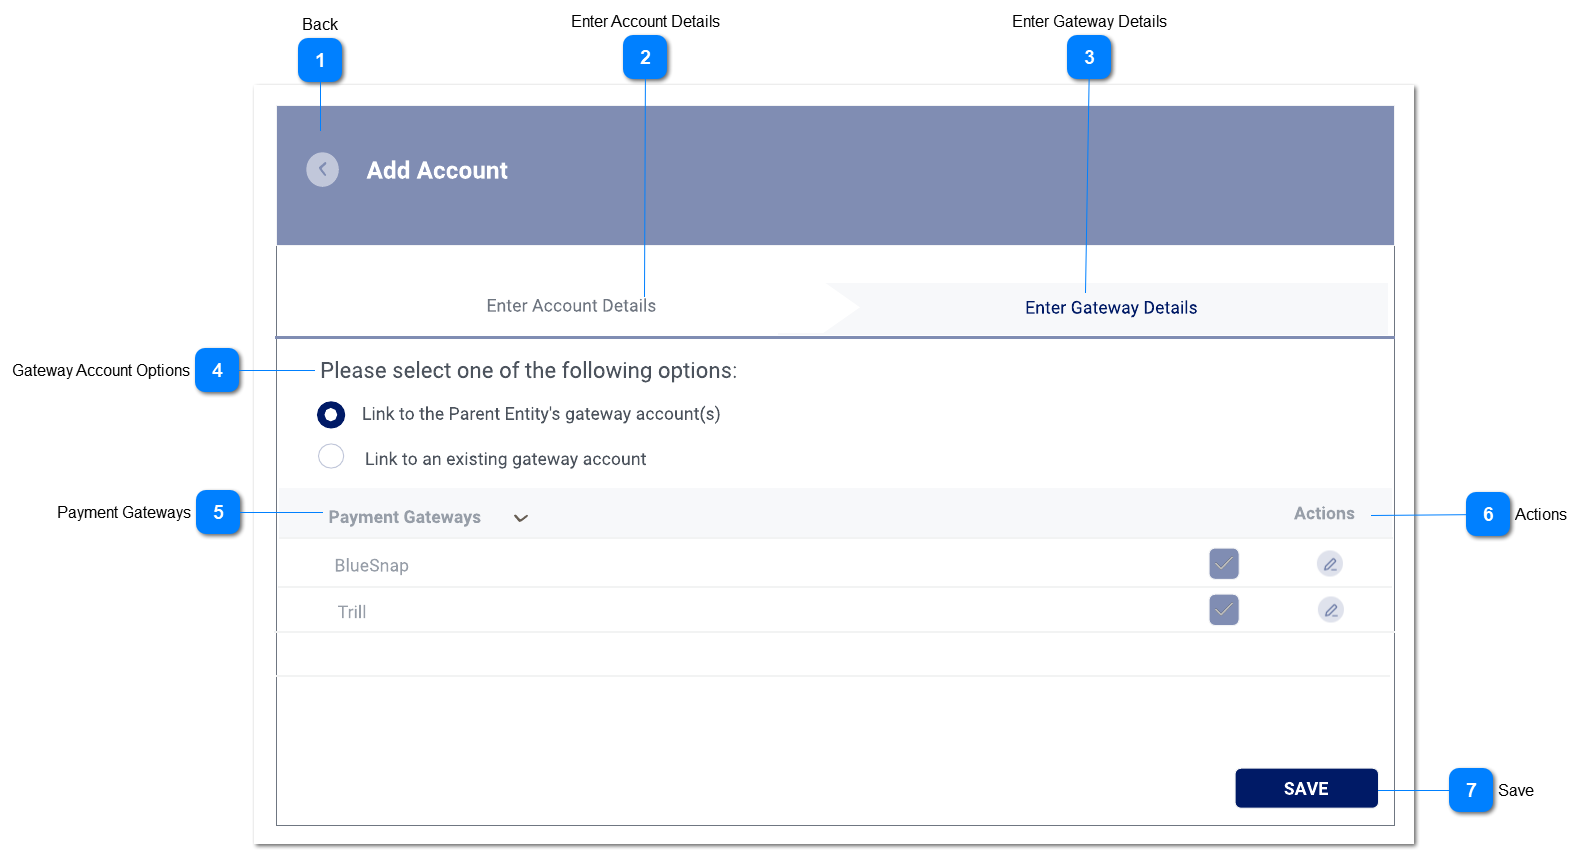
1. These radio buttons determine if the Account is linked to the Parent Entity's Gateway accounts or if the Account will have it's own Gateway accounts.
2. If the "Link to the Parent Entity's Gateway account(s)" option is selected, disable tickbox selections and display all gateways with Gateways used by the parent entity being shown as ticked/ selected.
2a. Clicking on the view button should open the Payment Gateways slider menu in view mode.
3. If the "Link to an existing gateway account" option is selected, enable tickbox selections and display the Gateways where the accepted Country matches the country the merchant is located in.
This column should be filtered and should only show Gateways where the accepted Country matches the country the merchant is located in.
1a. The column should be sortable.
A gateway can be selected for use within the merchant account by clicking on the tickbox adjacent to each gateway name.
2a. No gateways will be selected by default when the screen is first loaded.
2b. Multiple gateways can be linked to a single merchant account by selecting more than one tickbox/ gateway.
When a Gateway is selected, display the Payment Gateways sliding screen with blank fields within the screen.
If the user navigates away from the Payment Gateways sliding screen without entering any relevant details, the Actions column should display a warning icon.
De-selecting the selected gateway should remove the link between the merchant account and the gateway.
5a. The edit button within the Actions tab should also be deactivated.
A payment gateway should be selected for the edit button to be activated.
2a. If a payment gateway is not selected, the edit button should be deactivated.
Clicking on the edit button should navigate the user to the Payment Gateways screen.
f the user navigates away from the Payment Gateways sliding screen without entering any relevant details, the Actions column should display a warning icon.
4a. Hovering over the warning icon should display a hover message.
-
-
Y
-
-
4a. Please complete configuration for this gateway.
1. Atleast one gateway should be selected prior to successful save. If no gateways are selected, display an inline error message.
2. Check that relevant details have been added to the Payment Gateways sliding screen, and show error messages for incomplete configuration AND validate compulsory fields based on rules defined.
3. If the gateway configurations are complete, then save all Gateway options selected and details entered and display message.
4. Navigate the user to the View Account - Gateway Details - PM screen. Refer to the specifications for that screen here.
-
-
-
-
-
1. Please select at least one gateway.
2. Warning
Please complete configuration of selected gateways.