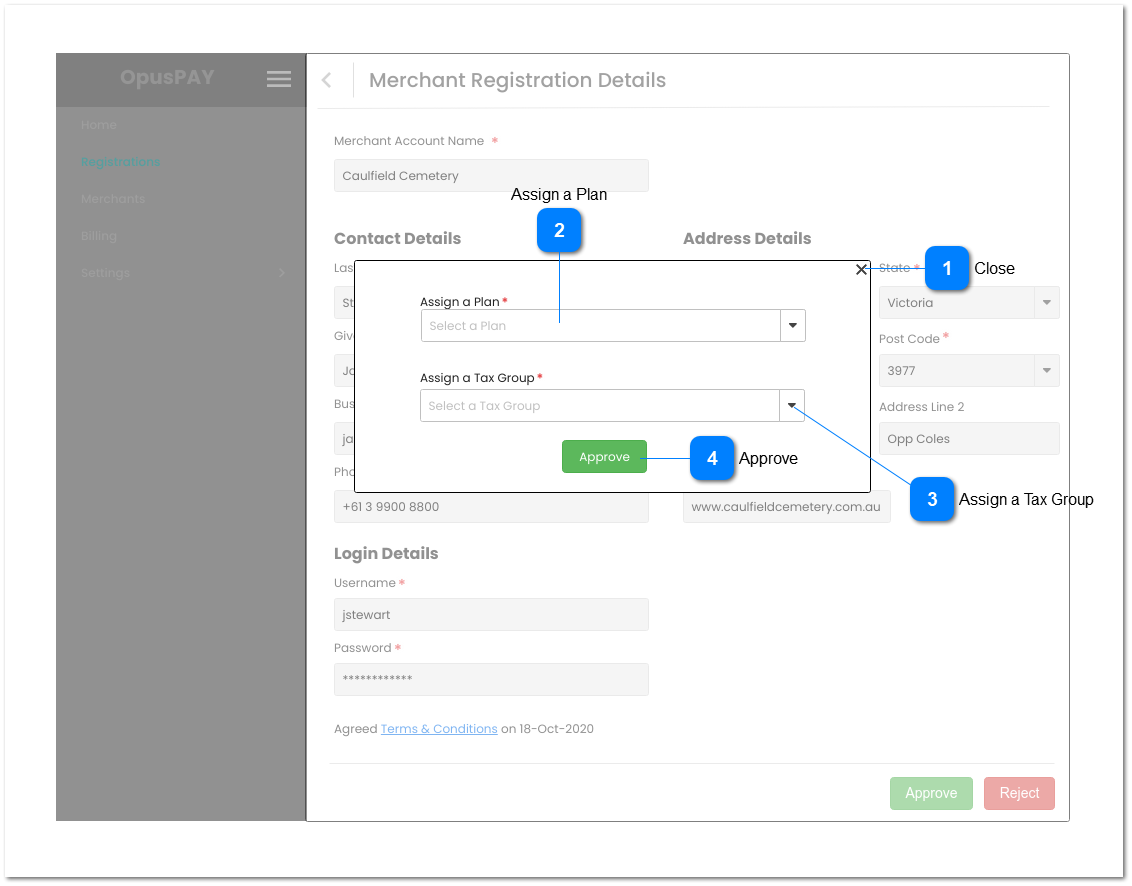
This modal allows the user to assign a Plan and Tax Group to an organisation when approving the registration in order to setup their merchant account with OpusPAY and process transactions.
Close
Type
Notes
Rules
Compulsory
Format
Edit
Size
Default
Error Message
Button
-
1. This allows the user to close the modal.
2. Closing the modal will cancel the registration approval action.
3. The user is returned to the Merchant Registration Details screen when closed. Refer to the specification for the screen here.
Admin Security Profile must already exist. Admin profile has full access to every function.
1. This should be disabled & greyed out until both plan and tax group options have been selected.
2. This should create a primary merchant account in OpusPAY and save the details to the database. Including setting the merchant status to Active.
3. When creating User, set Security Profile to Admin.
4. Automatically generate and store OpusPAY API credentials for this merchant.
5. If the merchant has a byondcloud account, send Merchant ID, Registration Status of "Approved", and API credentials to byondcloud.
6. If the merchant has a byondpro account, send Merchant ID, Registration Status of "Approved", and API credentials to byondpro.
7. This should send a 'your account is ready' email to the merchant user confirming they have successfully registered with OpusPAY. Refer to the email body content here.